
I only drink kombucha to celebrate, to socialize, to relax, to energize, to eat a meal, to watch a movie… OK, so I drink a lot of kombucha. I’m lucky to have a few incredible local craft kombucheries in my state like Blue Ridge Bucha, Mountain Kulture, Ninja, MTO and Buffalo Mountain. Many are served in our local movie theaters and restaurants, on tap at our favorite breweries and in small AND large grocery stores. We are very lucky. But as you fellow booch-heads know, the habit can get expensive. To cut costs we were buying in bulk: cases, then liters, then a 64oz growler. While I fully endorse supporting your local booch breweries, the most cost-effective way to supplement your fix is to brew a little yourself! You’ll have a lot of fun in the process.
Why drink the stuff anyway? Not only does kombucha contain living probiotics, amino acids, polyphenols, and active enzymes but it’s also refreshing and energizing in a way that coffee, soda and alcohol are just not. It retains the best qualities of all 3 without the sugar crash, caffeine jitters or queasy hangover.
I will say I craved and drank kombucha throughout my entire pregnancy. I’m certain my probiotic-rich diet has given my daughter’s microbiome a stellar start. Check out this study on maternal probiotic intake on fetal immunity. I also credit it for building up my own microbiome and immunity. I’m grateful to have not been sick since 2013 (except for one case of food poisoning that Dave and I enjoyed together – gross). Not a single cold, flu or stuffed nose even while working in a hospital and being in the presence of repeatedly ill persons. Anecdotal, but take it for what you will!
OK, here’s what you’ll need:
Ingredients
- SCOBY (buy or make yourself)
- Organic Black Tea (bags or loose leaf)
- Pure cane sugar
- Juice, fruit or other flavors of choice
Supplies
- Brewing vessel
- Brew vessel cover
- Fermentation bottles
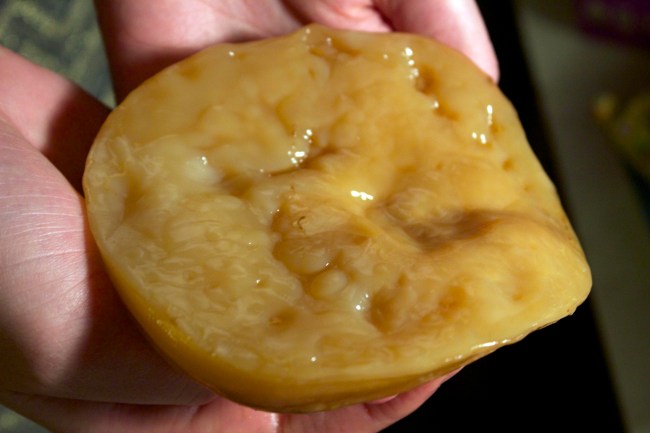
What the heck is a SCOBY?! A SCOBY is a Symbiotic Culture of Bacteria & Yeast. Yes, it is actually a slimy bacteria pancake that floats around in your tea until kombucha is made. Mmm tasty, right?
And yes, all kombucha comes from SCOBY. There’s no getting around that. In fact, you can see evidence of a new one forming when it settles to the bottom of your store-bought bottle!

Next, you’ll need to decide whether to buy a SCOBY or grow your own.
TRY TO SCORE A SCOBY (CHEAP OR FREE)
There are plenty of places to purchase SCOBYs online. Do this at your own risk. Online sources range from iffy quality to extremely expensive. Either way, since SCOBY reproduce, brewers have more than they know what to do with. For this reason, you can often find people willing to sell or give away their extras. When I was getting started, I posted a Craigslist ad for a SCOBY baby and received a ton of friendly responses. It’s a great little community- most hobby brewers are happy to help you get started by giving you a free or cheap one. Just make sure it comes with a little “starter tea” (hopefully 1 cup, or more) so you can skip that step.
OBTAIN BREWING VESSEL
Your brewing vessel will need to have a wide opening and preferably be made of glass. I re-purposed a couple half gallon (64oz) wide-mouth mason jars but any large glass storage jar should work. As for the brew vessel covering up-cycle a piece of cloth or borrow cheesecloth or a paper coffee filter from your kitchen. The purpose is to keep dust and fruit flies out while also letting your SCOBY breathe. I cut up an old washcloth and secured the pieces with elastic hair ties.
IMPORTANT: There is nothing more devastating than finding mold growing in your kombucha and having to completely start over. For this reason, make sure everything is very clean. But not sterile/ antibacterial – hello, we’re trying to grow a good bacteria pancake. Use white vinegar to sanitize your hands, supplies and surfaces every time. If you use soap or cleaners, you risk killing your SCOBY. Also, do not expose your any kombucha or SCOBY to metal utensils, for the same reason.
MAKING STARTER TEA
If you’ve purchased or begged a SCOBY, it probably came with a little starter tea. If it didn’t come with enough to make about a cup, add some White Distilled Vinegar. Skip to the “Brewing your Booch” section.
No SCOBY with starter tea? Here’s how to grow your own:
Starter Tea Ingredients
- 1 bottle of raw unflavored kombucha
- 1 cup of filtered water
- 1 bag of tea OR 1 tablespoon of loose leaf tea
- 1/4 cup pure cane sugar
Bring the water to a boil in a saucepan or pot. Turn off the heat. Mix in sugar until completely dissolved then immediately drop tea bag or loose leaves in. Allow to steep for 20 minutes. Carefully remove teabag or strain into brew vessel, then let cool.
Once tea has cooled to room temperature, you can add the bottle of kombucha into the brew vessel. Be patient! If you pour the kombucha into tea that hasn’t properly cooled down, the bacteria could die.
Done. Now just add your brew vessel cover and secure with elastic! You’ll want to store your vessel somewhere dark and peaceful, where it can do its thing without being jostled around. I always keep mine in the cabinets above our stove. Ideal brewing temperature ranges from 68-78 degrees Fahrenheit and it naturally takes a bit longer in the winter. Summer speeds up brew time.

SCOBY will slowly form in 2-4 weeks. Some signs of healthy growth are brownish strands, bubbles, then getting cloudy, then transparent then… a SCOBY! If you see anything weird (especially colors like black, blue or green) throw it out and start over. If it’s looking good, try to wait for your SCOBY to become about 1/4 inch thick.
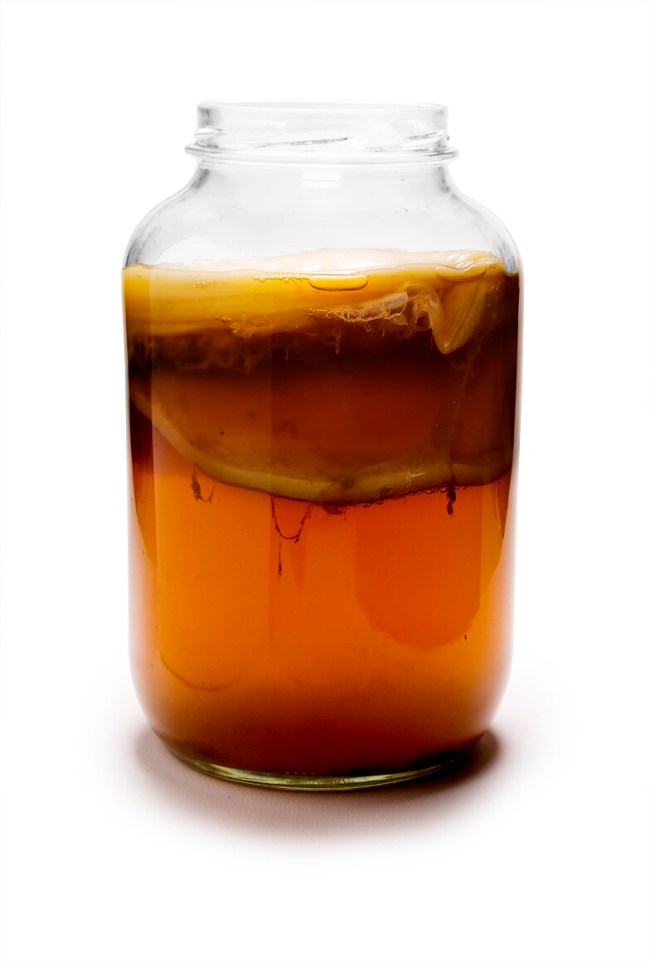
Now that you’ve grown your SCOBY, save the rest of this liquid in the refrigerator as your starter tea. You’ll need a little every time you brew a new batch of kombucha. You can also use it to store extra SCOBYs.
BREWING YOUR BOOCH
Now finally… you have your SCOBY, some starter tea, your ingredients and supplies.
Time to make your first batch of kombucha! Aka First Fermentation.
Ingredients:
- 1 SCOBY
- 4 bags of tea OR 1 tablespoon of loose leaf tea
- 1 cup of starter tea
- 3/4 cup of pure cane sugar
- 6 cups of filtered water
Bring the water to a boil in a saucepan or pot. Turn off the heat. Mix in sugar until completely dissolved then immediately drop tea bags or loose leaves in. Allow to steep for 20 minutes. Carefully remove teabags or strain, then pour directly into clean brew vessel to cool.
Once tea has cooled to room temp you can add the SCOBY. Be patient! If you put the SCOBY into tea that hasn’t properly cooled down, it could die.
Done. Now just add your brew vessel cover and secure with elastic. You’ll want to store your vessel somewhere dark and peaceful, where it can do its thing without being jostled around. I always keep mine in the cabinets above our stove. Ideal brewing temperature ranges from 68-78 degrees Fahrenheit and it naturally takes a bit longer in the winter. Summer speeds up brew time.
The brew time also really depends on your personal preference. The longer it goes, the more sugar the bacteria will consume- making it more tangy and less sweet. The average is about 10 days. Experiment! Gently dip a large very clean wooden spoon into your brew to try a little when you think it’s getting close. Or dip a straw in by blocking one end with your finger. Be very careful not to add to your own personal bacteria to the culture. Store the SCOBY in refrigerated starter tea for your next batch.
You will notice that a new “baby” SCOBY forms on top of its mother. It’s recommended that you keep them together for subsequent batches until the baby is big enough to be on its own: about 1/4 inch thick. At that point they can be separated to brew two batches at once. Either store the baby in some starter tea in the refrigerator or give the baby to a friend who wants to start brewing.
Optional: SECOND FERMENTATION

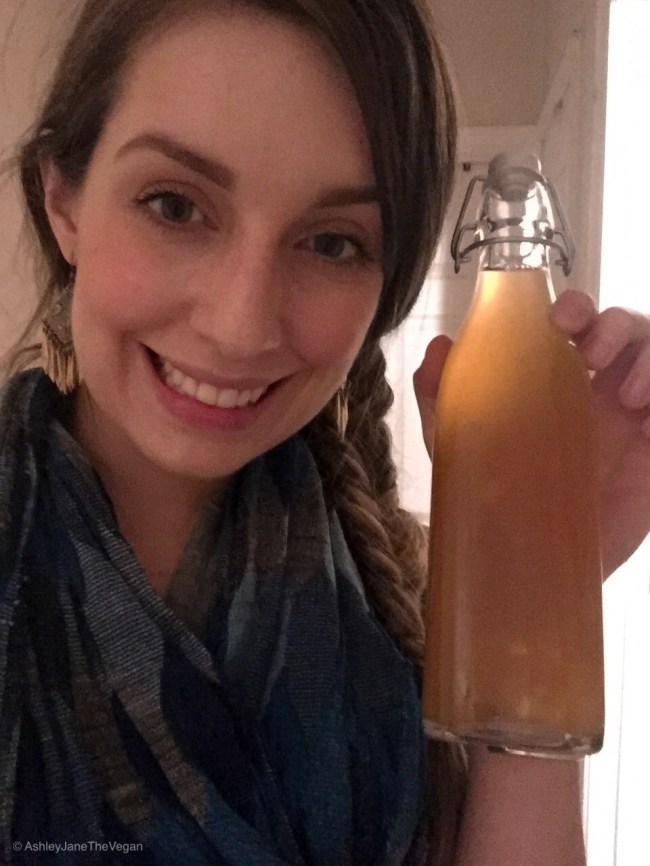
If you want to add bubbles and experiment with flavoring, try this! Obtain some glass bottles with Grolsh swing top lids. Use a plastic or silicone funnel to put some of your new kombucha into the bottles leaving some room for additions. Add fruit juice, fresh fruit, raw ginger, dried herbs, whatever! Leave a few inches of headspace for carbonation pressure. Store in a dark and safe place.
To prevent exploding bottles, it’s recommended you “burp” your bottles every day or so to release excess pressure. This can be pretty scary/ exciting – almost like popping a can of biscuits. Your booches should be pretty carbonated by 2-14 days. Once you’re happy with it, strain additives (if you want) and move to refrigerator to halt fermentation. Enjoy!
Let me know if you have any questions or tips!
Have you ever brewed kombucha at home?
What are you favorite flavors and methods?
